The SAP system profile parameter auth/no_check_in_some_cases has the value
“Y”. If the profile parameter is set to .N, the value must be changed. (This ensures better security).
If roles were already used in the source release, they must be updated. Transactions that were selected in the menu of existing roles can be protected using additional authorization objects in the target release. This means that tables USOBT_C and USOBX_C have to be updated as well as the existing roles.
The SU25 tcode is used for to fill the customer tables of the profile generator the first time the profile generator is used, or update the customer tables after an upgrade.
1. SU25
Step 2A
Compares the new USOBT and USOBX tables with USOBT_C and USOBX_C.
This compares the Profile Generator data from the previous release with the data for
the current release. New default values are written in the customer tables for the
Profile Generator
Step 2B
Add any new transactions/updates to tables USOBX_C and USOBT_C.
If you have made changes to the check indicators or field values in transaction
SU24, you can compare these with the new SAP defaults. You can see the values
delivered by SAP and the values that you changed next to each other, and can make
an adjustment, if desired.
Hint:
Steps 2A and 2B make changes to the customer tables of the Profile Generator.
If you want to transport these changes, choose step 3 in transaction .SU25. Before implementing any changes in system, take corresponding business approval for all role changes. The step 2C and 2D step will clearly identify the roles affected and new tcodes introduced in new systems.
Step 2C
This step guides you through all the roles that are affected by newly added authorization checks and that have to be changed to correspond. The corresponding authorization profiles need to be edited and regenerated. You can jump directly to role maintenance.
SU25, 2C step also contains the new SAP roles introduced.
If you go to one by one role, there are some authorization objects that are got affected during upgrade. We can categorize these authorization objects as below:-
1. Standard New – These are new authorization objects that are introduced in new system for corresponding tcode.
2. Manually new - It shows the authorization objects which were manually added in old system. Some of the values got updated for this also.
3. Standard Updated - Updated means, in old system if you have kept the standard values as it is, SAP has updated these standard values (u can check this one in SU24 check indicators).
4. Maintained New- Some of the organizational values introduced as field in authorization object.
After maintaining all new authorization objects, you can save it and generate the profile. If you get back to SU25 2C step shows all the roles with green signal. Means all roles saved and generated.
SU25, 2C step also contains the new SAP roles introduced.
After generating all profiles in SU25 2C step, you can jump to 2D step.
Step 2D
If you execute this step, it will show the list of roles and old tcode and corresponding new tcode.
If business wants to use new tcode, then u can replace old tcodes by new one by clicking on automatically adjust menu. Otherwise go to manually adjust menu and generate the profile.
The new tcodes are introduced in 2D step, this doesn't means the old tcodes are no longer exists in new system. We have to check manually for each and every tcode.Some tcode does not exists in new systems. FOr e.g. RZ02 is replaced by RZ20 in ECC6. RZ02 no longer exists in ECC6.
STEP 3
This step transports the changes made in steps 1, 2a, and 2b. Tailoring the Authorization Checks .This area is used to make changes to the authorization checks.
STEP 4
Changes to the check indicators are made in step 4. You can also go to step 4 by calling transaction-SU24.
You can then change an authorization check within a transaction.
1. When a profile to grant the user authorization to execute transaction is generated, the authorizations are only added the Profile Generator when the check indicator is set to Check/Maintain.
2. If the check indicator is set to do not check, the system does not check the authorization object of the relevant transaction.
Review Items:-
Security Related Parameters
You can compare and check security related parameters from old release to current release.
Review users (via SU01) to check for any new or changed fields on the user masters (Check especially background user-ID for authorizations, to avoid cancellation of batch jobs).
Blog about SAP ERP especially on technical field such as SAP Basis/NetWeaver concepts, monitoring, administration, performance tuning, SAP Implementations, ABAP, Data Migration, OS, Database server, and FAQs
Showing posts with label RZ20. Show all posts
Showing posts with label RZ20. Show all posts
Thursday, March 29, 2012
Friday, June 17, 2011
SAP Basis Daily Check
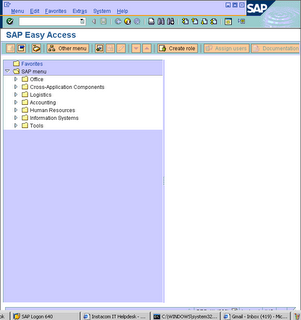
SAP Logon Connection Test
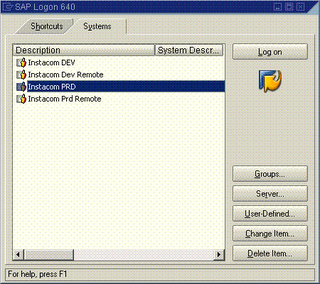
1. Double click on all above instance to check if you are able to login.
2. If login sucessful, this means server is alive and has no connectivity issue. A new screen will pop up. See below

1. Double click on all above instance to check if you are able to login.
2. If login sucessful, this means server is alive and has no connectivity issue. A new screen will pop up. See below
DB12/DB13 Create and Check backup status
1. On the command field, key in DB12 and below screen will be displayed. It shows the summary of the backup status.
1. On the command field, key in DB12 and below screen will be displayed. It shows the summary of the backup status.
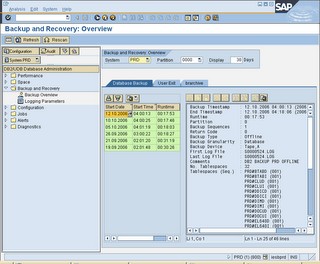
2. On command field, enter /nDB13. This T-code is used to perform backup. You can also check the backup status.
3. In DB13, select a desired cell which you plan to perform your backup. Double click on the cell
4. Choose Full database backup to device
5. Backup mode: Offline
6. Device directory: ‘ d:\backup\ (this is just a folder which your backup could be stored)
7. Below is a sample picture.
4. Choose Full database backup to device
5. Backup mode: Offline
6. Device directory: ‘ d:\backup\ (this is just a folder which your backup could be stored)
7. Below is a sample picture.
1. Use DB02 to check DB size
2. Database current size (GB) is Total DB size – Free space
2. Database current size (GB) is Total DB size – Free space
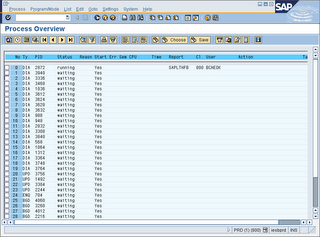
SM50 Check if instance is running on all servers1. All work process is either running or waiting and none are stopped except CPIC (interprocess communication)
2. Make sure not all dialog work process are used up, otherwise other user cannot make any transaction.
2. Make sure not all dialog work process are used up, otherwise other user cannot make any transaction.
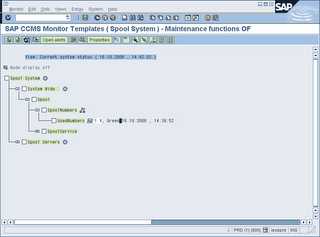
RZ20 Check filling degree of spool used numbers
1. Click on SAP CCMS Monitor Templates
2. Click on SPOOL System
3. System Wide > Spool > SpoolNumbers > UsedNumebrs
4. If value greater then 80% in spool numbers – will lead to system wait until spool reorganisation is done
2. Click on SPOOL System
3. System Wide > Spool > SpoolNumbers > UsedNumebrs
4. If value greater then 80% in spool numbers – will lead to system wait until spool reorganisation is done
SM13 Check if update is active
1. Enter SM13 and make sure UPDATE SYSTEM STATUS : Update is active.
2. Make sure client = *, User =* and status = All, Press F8 to execute
3. Click on any entry with error
4. You may have to dig deeper (SM21, ST22, DB02, etc) and work with functional expert to resolve the issue
2. Make sure client = *, User =* and status = All, Press F8 to execute
3. Click on any entry with error
4. You may have to dig deeper (SM21, ST22, DB02, etc) and work with functional expert to resolve the issue
SM12 Check lock entries with long duration
1. Type SM12 in command field
2. Client = *
3. User name = *
4. Click list.
2. Client = *
3. User name = *
4. Click list.
Its important to notice all values under the time column show the current time. Jobs with earlier date should be immediately investigated. These locks are problematic because it prevents access or changes to the locked records.
ST22 Check and analyze SAP ABAP short Dumps
An ABAP dump (AKA short dump) is generated when a report or transaction terminates as the result of a serious error. The system records the error in the system log. SM21 and write a snapshot (dump) of the program terminiation to a special table (SNAP). This transaction can also be called from the system log (SM21). ABAP dump is used to analyze and determine why the error occured and take corrective action
An ABAP dump (AKA short dump) is generated when a report or transaction terminates as the result of a serious error. The system records the error in the system log. SM21 and write a snapshot (dump) of the program terminiation to a special table (SNAP). This transaction can also be called from the system log (SM21). ABAP dump is used to analyze and determine why the error occured and take corrective action
(no print screen – currenly my SAP has no Runtime errors)
Once Runtime errors is displayed
1. Double click on the entries
2. A detail analysis on the error will be displayed
3. Dump contains the follow information
- Why program has been terminted
- What caused the program termination
- Where in the program code the termination occured
- What you can do to correct the error
- The values of the relevant system fields when the program terminated
- The calls or events that was active when the program terminated
- Any other programs that are affected
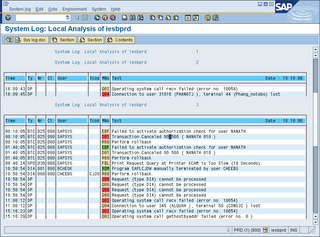
SM21 Check and analyze SAP system log for any critical log entries (hourly)
1. Type SM21 into command field
2. Enter the relevant details and execute
3. Look for unusual entries.
4. Double click on the entries for more information
Lastly, a few more userful transaction
1. SM37 – Check and analyze failed background jobs
2. SP01 – Check SPOOL for errors
3. ST06 – CPU & Memory Utilization
4. ST03 – Check for database performance and response time
5. ST11 – Check for core file entries
2. SP01 – Check SPOOL for errors
3. ST06 – CPU & Memory Utilization
4. ST03 – Check for database performance and response time
5. ST11 – Check for core file entries
Subscribe to:
Posts (Atom)
